22 Nov 2020

I’ve already created something similar in my app, Entropy, but the way I do it is far from convenient. I wanted to write about that method when I used it originally but now that I’m updating that method, I’d like to run through how I did it then, how I’m going to do it today, and why today’s method is a lot better. First, let’s review what exactly this feature will do.
The end goal for this will be to have a place in our app where a user can see a piece of text that the developer updates without updating the app. (As I’m typing this I realize that may sound sketchy, but I’m sure you can think about other instances where apps make minor updates without going through the App Store. For example, Twitter rolling out their Fleets feature to certain accounts could be considered an example of this. It’s a feature that’s in the app that can be altered (disabled) without an update to the app.) This piece of text can be a message for the user like wishing them “Happy Holidays!”. This is the example we’ll use. I’ll also give a proposal for how you can randomize what text is being shown to each person, but, before we get into that, let’s go over what my current method is and why it needs an update!
I’ll be doing this with an iOS app and Swift because I think it’s particularly useful in that medium and it’s where I’ve done this before. There are many mediums in which you could deploy this feature as long as you have the ability to parse JSON or get text stored at a web address.
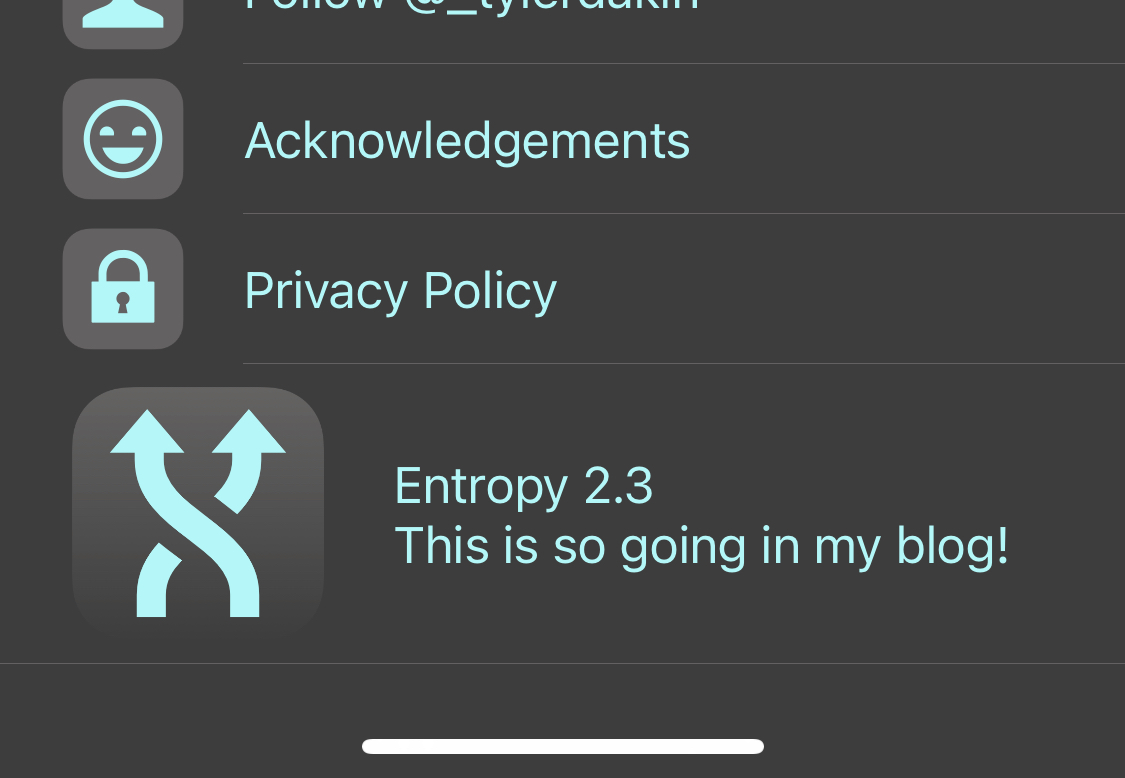
When I originally began preparing Entropy for its beta period and release, I did not know how to write HTML, CSS, or JS (my JS is still questionable!). In addition, for any prior websites I wanted to make for myself I had used Weebly, a drag and drop website builder that offered free websites if you used their domain. Entropy’s website is still being hosted by them at entropyapp.weebly.com (although I now wrap that link with my own domain whenever I mention it 😉).
So, with this being the case I could not use my own website to host just a simple JSON file. I wasn’t even as familiar with JSON and parsing it in iOS as I am today, but at the very least I think I remember thinking that this would be a better option if possible. With these circumstances, I decided my best option for creating a remotely updated splash text was to use Weebly. The problem with this method is that Weebly does not allow a super basic file hosting. Updating it is a bit tough because you have to go through their uploader and it’s a bit of a mess. Instead, I went with creating a private page that just has a bit of text on it in addition to the navigation. Then, on the app’s side, we use SwiftSoup to scrape that text from the website. Another problem here was that Weebly doesn’t allow customizing the HTML so I had to use Inspect Element to find the class that I’d have to scrape. Here’s what the old method essentially boiled down to in code:
func retrieveMOTD() {
    let url = URL(string: "https://entropyapp.weebly.com/motd")!
    let task = URLSession.shared.dataTask(with: url) { (data,response,error) in
        if error != nil {
            print("ERROR: \(error!)")
            motd = ""
        }
        else {
            do {
                let htmlContent = NSString(data: data!, encoding: String.Encoding.utf8.rawValue)
                let doc: Document = try SwiftSoup.parse(htmlContent! as String)

                //This gets the motd
                var text = try doc.select("div.paragraph").text()

                motd = "\(text)"
            }
            catch {
                print("There was an error.")
            }
        }
    }
    task.resume()
}
I’ve left out some formatting, but that’s the gist of it. The problem with this is that it relies on Weebly’s Paragraph blocks having the class “div.paragraph”. If they ever change that, my app will just catch the error and not deliver the message. Luckily, these aren’t very high stakes. However, this method still isn’t convenient because it’s a pain in the arse to log in to my Weebly account, just to write a few lines of text, and then have to remember when to change it back (especially if it’s holiday related; Entropy was celebrating Halloween for most of November 2019 thanks to this method and my poor memory!). So, with that, let’s get into making this a lot simpler for myself!
Fun Fact: While editing this I found a bug in Entropy where if there is nothing written in the Weebly paragraph block and Entropy tries to grab the splash text (which it does often), the app crashes! Good thing I’m about to completely change the method instead of fixing that one bug. 😄
With the creation of my new personal website (the one you’re on right now), hosting a file is as simple as ever for me! This means getting a JSON file that can relay our splash text to our app should be really simple! For the sake of simplicity, I’m actually going to do the work for this article outside of Entropy, in a blank state. The focus of this will be on preparing the file, getting it hosted, and creating the Swift function that will retrieve and parse our data. The UI is up to you!
If you haven’t worked with JSON before, this might seem a bit foreign but it is far from complicated! Once you see a small bit of JSON, you don’t have far to go before you’re used to it. In this case, the JSON is really easy to follow! Just one actual line in between some braces! There are lots of great guides on how to use and format JSON but this is not one of them! I will give this piece of advice, though: I’m using Simon Støvring’s app Jayson to put my JSON file together. It’s actually the first time I’ve used it, since it wasn’t launching properly during the macOS Big Sur beta, but it’s really quite excellent to use! Very easy and exactly what I’d want out of a JSON editor based on what I’ve seen so far, though I haven’t spent too much time with it.
Also, if you don’t have a particular use for this just yet, free to use this link to grab the JSON file from, it’s just the one I’ll be using for Entropy’s source. I wouldn’t recommend using it elsewhere, otherwise the messages might be out of context!
SOURCE: https://site.tylerdakin.com/motd.json
Create a new file, I’ll call it “motd.json” for “Message of the Day”. Then, we need to actually get the JSON in there, so let’s start with this blank template:
{
    "motd":
}
And just throw your message in right after that key:
{
    "motd": "🎁 Happy Holidays! ☃️"
}
And fun fact, that’s all we need! Our JSON file is done and we can upload it to our host. I’m using GitHub Pages for my website’s host. All you need is somewhere to put the file that will display it in raw text when you go to https://YOURHOST/motd.json. If you want a free website option, I’d recommend going through GitHub Pages, it’s worked great for me. (FYI it looks like GitLab Pages is a thing too! I plan on switching over to them at some point but have not yet.)
NOTE: You may be wondering why I’m using JSON for this. After all, writing plain text and grabbing that on the iOS side is probably easier. Well, later on in this article I’ll write about how to do this with just a text file but the JSON file lets us add as many properties as we want and makes it easy to parse in the app. In addition to “motd” we could have “hiddenPromoCode” as a property to display a promo code at the very end of a table view, for example, but only on certain days (when there’s a promo code available). I’m sure those reading this can come up with loads more ideas for how this could be used but for now I’m going to stick to a message of the day.
Alright, onto the fun part! The best way to get ready for this step is to make sure you have some sort of UILabel equivalent that you can update in your app!
Once you have that label ready, create a variable called “motd” and make sure it’s in the same scope as your label property.
var motd: String = "" {

}
In those braces, I’m going to put the didSet Property Observer. What this will do is copy the text stored at motd to the label.
var motd: String = "" {
    didSet {
        myLabel.text = motd
    }
}
Great! Now, whenever we update that motd variable, our label will update with it. Let’s get on with retrieving the data.
Get a new Swift file going, I’ll call mine “RetrieveMOTD.swift”. Here, we’re going to create the function that will grab the message and assign it to our motd variable. However, our motd variable is in another file, and probably in another class. To get around this, I’m going to put my function in the same class as that variable using Swift’s extension keyword. Your RetrieveMOTD.swift file should look something like this, now:
extension YourClass {
    func retrieveMOTD() {
        motd = "It worked!"
    }
}
I’d recommend testing that code now by running the function in your viewDidLoad(). Just make sure the label is getting updated properly before we move on.
Next, let’s prepare our data model for the JSON data that we retrieve. This is really easy if you’ve kept it to just the “motd” property in your JSON. Reason being: we need to have a property in our struct for each of the properties in our JSON file and the struct also needs to conform to Codable so we can decode our JSON data into that struct. Put this outside of the extension code:
struct Response: Codable {
    let motd: String
}
Going back to the retrieveMOTD method, let’s get our URL and URLRequest ready. The URL is going to be wrapped in a guard let so we can handle an error if one comes up. I’ll also add the URLSession Task. Make sure to add “.resume()” after the curly braces!
extension YourClass {
    func retrieveMOTD() {
        // Put your link in for the string, instead of my link!
        guard let url = URL(string: "https://site.tylerdakin.com/motd.json") else {
            // Visual feedback if something goes wrong
            print("URL not valid")
            return
        }

        let request = URLRequest(url: url)

        URLSession.shared.dataTask(with: request) { [weak self] data, response, error in

        }.resume()
    }
}
Now we have to handle the data we get back from the URLSession. If we get proper data back, great! If not, we’ll print the error to console.
// Within the URLSession in retrieveMOTD
guard let data = data else {
    print("No data found.\nERROR: \(error?.localizedDescription ?? "Unknown Error")")
    return
}
Lastly, we have to decode the JSON data into our Response struct that we made earlier. If we’re able to decode it properly, we’ll show that to the user by assigning our struct’s motd value to our ViewController’s motd value and letting the Property Observer do the rest. Otherwise, we’ll print to console that we couldn’t decode the data. Just make sure you put the update to motd in an async function. We need to update the UI from the main thread only so our app will crash if we don’t.
// Within the URLSession in retrieveMOTD
if let response = try? JSONDecoder().decode(Response.self, from: data) {
    // Program crashes without this because we need to update the UI from the main thread.
    DispatchQueue.main.async { [weak self] in
        self?.motd = response.motd
    }
}
else {
    print("ERROR: Could not decode JSON data.")
}
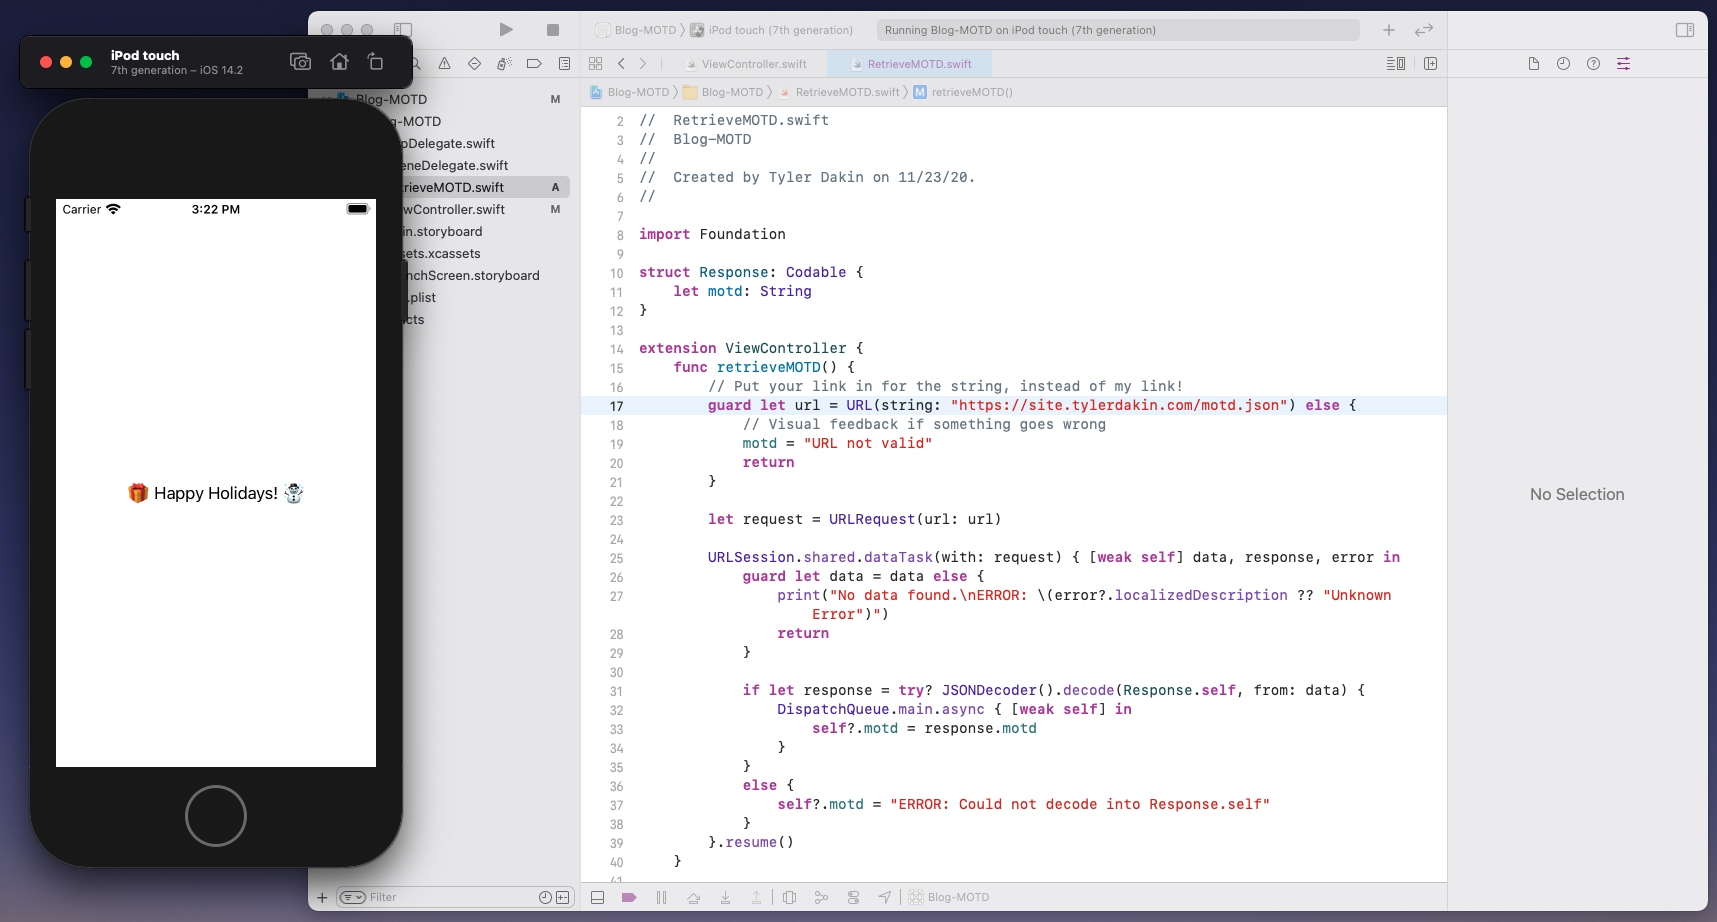
With that, your RetrieveMOTD.swift should look something like this:
struct Response: Codable {
    let motd: String
}

extension ViewController {
    func retrieveMOTD() {
        // Put your link in for the string, instead of my link!
        guard let url = URL(string: "https://site.tylerdakin.com/motd.json") else {
            // Visual feedback if something goes wrong
            motd = "URL not valid"
            return
        }

        let request = URLRequest(url: url)

        URLSession.shared.dataTask(with: request) { [weak self] data, response, error in
            guard let data = data else {
                self?.motd = "No data found.\nERROR: \(error?.localizedDescription ?? "Unknown Error")"
                return
            }

            // Within the URLSession in retrieveMOTD
            if let response = try? JSONDecoder().decode(Response.self, from: data) {
                // Program crashes without this because we need to update the UI from the main thread.
                DispatchQueue.main.async { [weak self] in
                    self?.motd = response.motd
                }
            }
            else {
                print("ERROR: Could not decode JSON data.")
            }
        }.resume()
    }
}
Mind you, I’ll have the full repo with all of these methods linked below as well. We should be set to run it now. Double-check that a call to retrieveMOTD() is in the viewDidLoad() or that it can be triggered some other way and try it out. You should see that when you call retrieveMOTD(), the text changes to whatever message you put in your JSON!
Okay, this is a great system and it has room for expansion. I’d argue that the expansion potential makes it the best solution. However, what if you really, really, don’t plan to expand this feature? Let’s try accomplishing this with just a text file. We’re going to use the same message but this time we’re going to upload to “https://YOURHOST/motd.txt” and we’ll have to change our Swift code to make it compatible. The benefits of this method are that it’s easier to change the message, because it’s just plain text, there’s no formatting, and the Swift code might end up being smaller. Let’s get into it.
This should be easy because there’s no formatting involved. Create a new plain text file, add a message, and upload it to your host. Make note of the URL that it gets uploaded to, because we’ll need that later. For this demo, I’ve uploaded the message “🎁 Happy Holidays from a text file! ☃️” to the following URL. Feel free to use it as a placeholder while you test:
SOURCE: https://site.tylerdakin.com/motd.txt
Everything in our ViewController should be okay. We’ll just change that motd variable when we have our text ready to go.
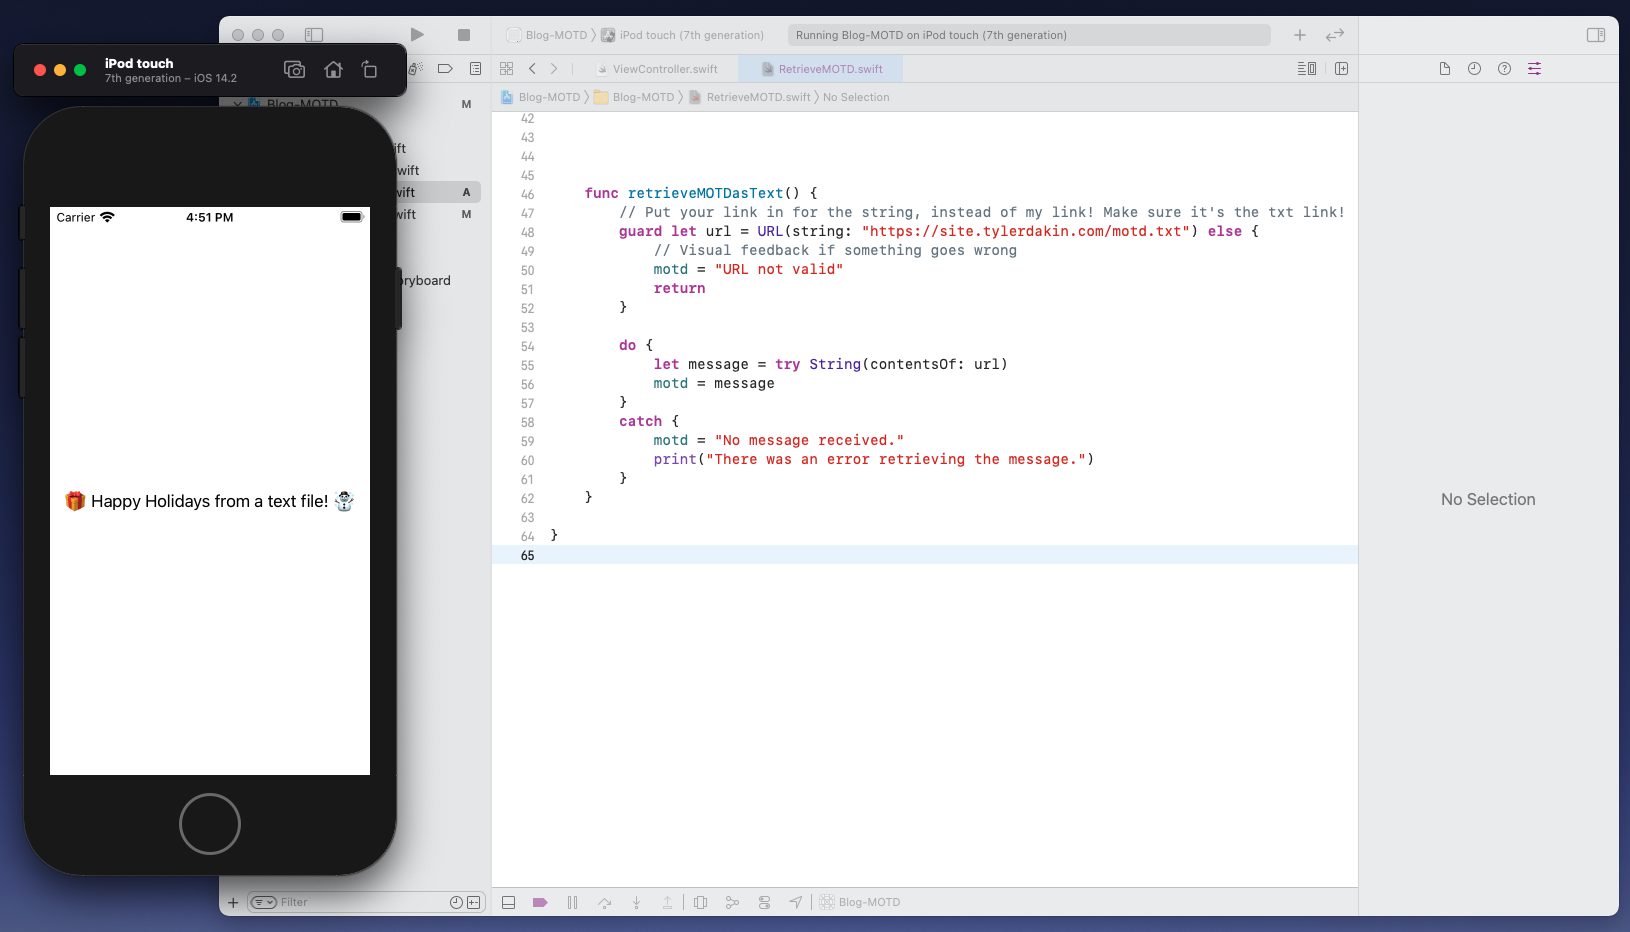
In the RetrieveMOTD file, within the extension to your class (ViewController), add another function called retrieveMOTDasText. This function is going to be a lot simpler than the previous one. We still need to verify the url, so that part can be copied from the previous method (other than the URL itself, of course).
func retrieveMOTDasText() {
    // Put your link in for the string, instead of my link! Make sure it's the txt link!
    guard let url = URL(string: "https://site.tylerdakin.com/motd.txt") else {
        // Visual feedback if something goes wrong
        motd = "URL not valid"
        return
    }
}
Now for some new code. We’re going to use String’s contentsOf: url initializer to get our data. This might not work if the url doesn’t store anything, though, so we need to wrap that call in a do catch block and begin the call with try. If we get the String back properly, we’ll send that to our motd variable. Otherwise, we’ll update the motd variable with an error message (printing to the console is acceptable here too; I’ve included both).
do {
    let message = try String(contentsOf: url)
    motd = message
}
catch {
    motd = "No message received."
    print("There was an error retrieving the message.")
}
And now our work is done! Again, this probably feels easier, and I’d say it is, but the JSON method allows for easy expansion later on and JSON is the standard format for other APIs that you’ll use. It’s definitely good to know. With that, though, let’s launch the app. You should see your message on screen once it’s been loaded.
Now, this system is really cool and should be easy to update. However, it’s not quite the same as the Minecraft example I showed earlier. What if we don’t want to update it often? What if, instead, we want the app to keep those messages fresh by showing a random one each time? This is the last part I’d like to show and the text format I just showed you is probably a great format to implement this feature with. Instead of just one line that we show to the user every time, we’ll write a bunch of phrases, one line for each, that we can then pick randomly from on the app. Every time the user loads the app, a new phrase will be shown.
We’re going to get into implementing that soon, but, first, I’d like to recommend that, if you’re following along with each chapter of this, you make a couple buttons on your app that will call each of the functions we’ve made. That way, you can make sure each of them are working independently, which they should be if you really have followed along.
Okay, let’s get into implementing this new feature. Start by creating a text file, I’ll call mine splash.txt. Add at least 5 phrases to it or copy the ones I’ve left for you below. Then, save and upload it.
Happy Holidays!
Season's Greetings!
It's the most wonderful time of the year!
❄️ ☃️ ⛷ 🌨
2020 is nearly over!
Again, I’ve uploaded this text to the URL below so you don’t have to find a host for your text file if you’re just practicing:
SOURCE: https://site.tylerdakin.com/splash.txt
Let’s make a new function in our extension for the ViewController called getSplashText.
We already know how to grab the text from our URL, so now we just have to grab a random line from the text we get back. To make this simpler, I’m going to copy the retrieveMOTDasText method and change it to return the String it finds at the URL. I’ll also add a urlString parameter so we can change the URL as needed. Once this is done, we can just call that new method instead of copying all of the code from retrieveMOTDasText into getSplashText. Here’s what the altered method looks like:
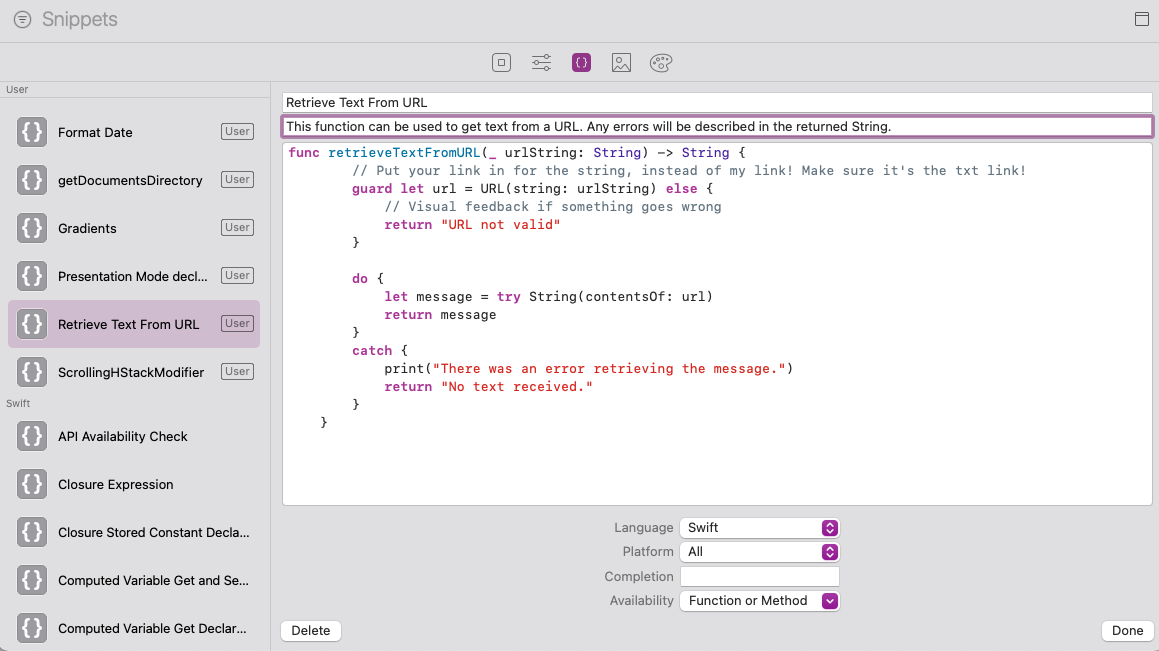
func retrieveTextFromURL(_ urlString: String) -> String {
    // No link needed here because it's provided by the caller!
    guard let url = URL(string: urlString) else {
        // Visual feedback if something goes wrong
        return "URL not valid"
    }

    do {
        let message = try String(contentsOf: url)
        // We return the message to the caller instead of changing the motd variable.
        return message
    }
    catch {
        print("There was an error retrieving the message.")
        return "No text received."
    }
}
You might notice that retrieveTextFromURL doesn’t rely on anything in our ViewController which means you don’t actually have to have it in the extension. Moving it outside allows you to call it from anywhere and you could even use it as a quick solution for future projects. I’d recommend selecting the whole function, secondary-clicking, and then choosing “Create Code Snippet” in Xcode to save that function for future use.
Okay, now that we’ve created that function, getting our text should be simple! Just call retrieveTextFromURL within getSplashText and make sure you have the URL as a String in the parameters. For now, print the result to make sure we get what we’re expecting. Run the code, but make sure you’ve added a way to run getSplashText, whether that be changing viewDidLoad or adding a button to call it:
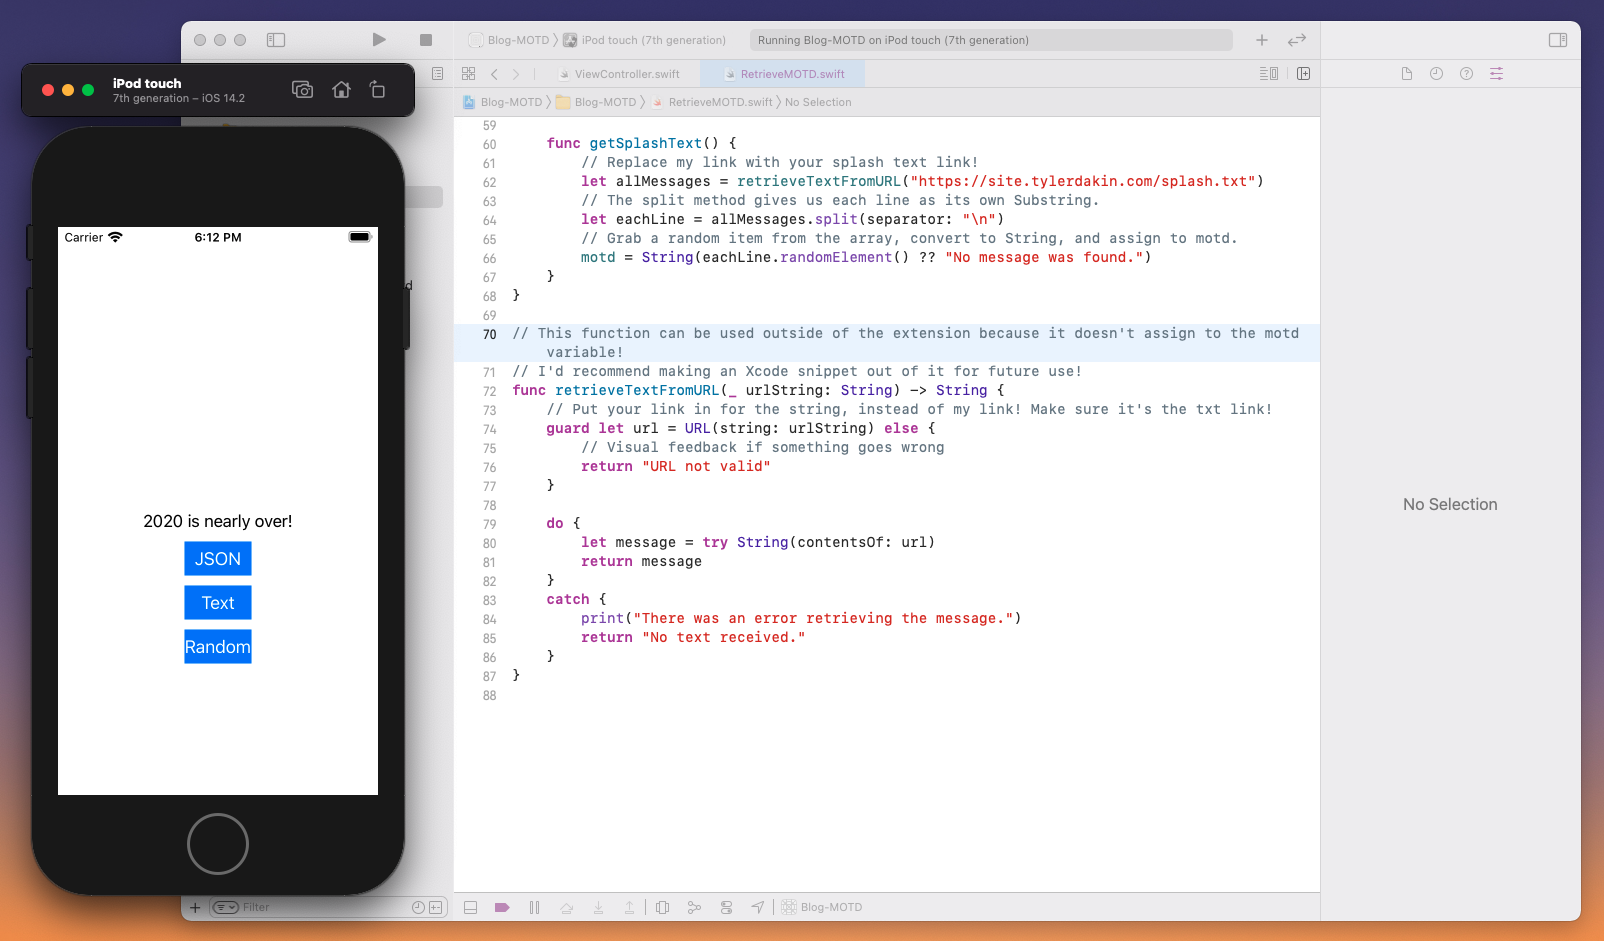
func getSplashText() {
    // Replace my link with your splash text link!
    let allMessages = retrieveTextFromURL("https://site.tylerdakin.com/splash.txt")
    print(allMessages)
}
As long as you see every message you added to that text file in your console, you should be all set! Now, let’s actually pick out a message and assign it to our motd variable! To do this, we’ll separate the String by any newline characters (‘\n’) using the .split method and then pick a random element out of the resulting array with the .randomElement method. Whichever element is picked will be what we assign to the motd variable.
func getSplashText() {
    // Replace my link with your splash text link!
    let allMessages = retrieveTextFromURL("https://site.tylerdakin.com/splash.txt")
    // The split method gives us each line as its own Substring.
    let eachLine = allMessages.split(separator: "\n")
    // Grab a random item from the array, convert to String, and assign to motd.
    motd = String(eachLine.randomElement() ?? "No message was found.")
}
And that should be it! Run your code, if the previous test worked fine, this should work as well. Trigger the getSplashText method a few times to make sure it’s not picking the same one every time!
This was more than I was expecting to write for my first post but I enjoyed it! Please let me know what you thought, if it was too long, if I should go further or less into detail, or any other criticisms you might have for me! I’m always reachable on Twitter (@_tylerdakin) or by email at dakint@icloud.com.
My finished project is uploaded to the following GitHub repo so if you want to take a closer look, feel free! The markdown file powering this blog post will be posted as the README there if you need to reference it for any explanations!